Monday, July 18, 2011

Review: LM 1/144 OZ-06MS Leo Custom


General/Technical Data

Series: Limited Model (LM) 1/144
Title: OZ-06MS Leo
Release Date: 12/1996
Suggested Price: ¥800 ($10)
No. of Parts: 22 + Polycaps + Water-Slide Decals
Plastic Color: Olive Green
Gimmicks: 105mm Rifle

Intro

For those who watched Gundam Wing, the Leo is the last mobile suit they'd ever want to pilot.  In the hands of a main character, it's almost invincible.  In the hands of a nobody, it blows up without even getting shot down.  Yet everybody in the Gunpla community seems to want one.  As luck would have it, Bandai released this simple, affordable and extremely rare model kit.

Torso


The torso consists of 2 parts that make up the head and chest and include pegs to attach the arms,  Another part depicting the rockets between the legs and in the "buttocks" goes underneath.  My only issue with this section is that stripes engraved on the Leo's head don't align perfectly.  Decals go on both sides of the chest and the lower back.

Arms


Each arm bears 4 points of articulation, rotating a full 360° at the shoulders, elbows and wrist, but rising at a 90° angle.  The polycap hands were a tight squeeze into the wrists, but were manageable once they were in.

Legs


Once attached to the ball joints at the torso and the feet, each leg has 4 points of articulation.  Unlike the actual mobile suit, the knees were missing the 'bolts' shown in the anime.  The double-joints legs bend back more than 90°, but bend them too much and they'll loosen up.  The feet (each molded in one piece) wiggle at the ankles but don't bend so far.

Weapons & Accessories


Once again, I bring up the anime because there you'd see the Leo packing a wide variety of weapons and equipment.  Even the action figure version has a full arsenal.  In this kit, you just get its signature pea-shooting rifle.  Other Gundam models from this particular line include at least 2 weapons, so there's no excuse.  2 decals go on the rifle.

Conclusion

You're not really missing anything by not having this kit, especially when you can buy newer, more articulated kits with more features (and at a much lower price in online auctions).  But since I own the whole Limited Model Gundam collection, I can say with complete confidence that with thick, solid parts and the most articulation out of the other models, the Leo is--ironically--the best of the worst.

Overall Rating: 3.5 Out of 5 Stars

That's it for my first Gunpla review for this blog.  The next one will be for my next project after the Leo Type IV.  Until then, I've gotta add more tools to my arsenal.

Saturday, July 9, 2011

WIP: 1/144 NG Leo Type IV Custom--Intro

Welcome back.  The next model on my agenda is something of a first for me--a kitbash (or a model built with parts from different kits).  Modelers kitbash to avoid making models from scratch, modify existing models or create subjects that don't have their own kits.


This is the Leo Type IV (or Grief/Gryph) as depicted in the ongoing Gundam Wing novel Frozen Teardrop and the comic book reboot Glory of Losers.  According to the pic, it features rear thrusters and a shoulder cannon from 2 other mobile suits in Wing.  Both have their own model kits but apart from being extremely rare, they're resin kits costing a lot of money.  Since I'm not made of either, I'll combine 2 kits that resemble Type IV the most.


Luckily I still have an extra 1/144 Leo I've bought a few months back, along with a 1/144 NG Tallgeese II, which has most of the parts that I need.  Since both kits have a similar construction and use the same polycaps, it reinforces the idea that you can mix and match kits from the same line of Gunpla.


Parts and accessories for the Leo


Parts and accessories for the Tallgeese II

All that's left now is to gather the necessary tools for the modifications I have in mind.  I figured I'd look around in my city's Chinatown, which has several anime and hobby shops.  But all I got was steamed pork dumplings and orange gummy hearts (both of which were pretty good).  So now I'm ordering everything online and I estimate it'll be at least a few weeks before I can actually start this project.  Until then, I might go back to Chinatown for some beef or chicken dumplings.

Monday, July 4, 2011

WIP: 1/144 LM Leo Custom--Part 5

Happy birthday, America!  On this day of independence, I exercise my right to show off a job well done.  I'm talking about exercising my bragging rights!  But before I finally unveil my completed 1/144 Limited Model Leo Custom, here are links to the previous posts to see how it was done:

Part 1
Part 2
Part 3
Part 4

Or you can just skip all that and see the finished product:


Front View


Side View (with some leg articulation)


Rear View


Action Pose


Though far from perfect, I'm really glad with how this turned out.


Wait, are we under attack?

That's it for my WIP posts on the Leo.  But remember: Grunt mobile suits may seem like cool battle machines, but then they're pitted against a Gundam.  Expect a full review of the Leo in the near future.  Join me next time when I embark on my next Gunpla project.  Until then, why don't you give Gunpla a try?

Sunday, July 3, 2011

WIP: 1/144 LM Leo Custom--Part 4

As mentioned in my last post, this post will explain the process of panel lining and applying a topcoat, and also applying water-slide decals.  For the uninitiated, panel lining is when you color the lines that are sculpted on a model, while a topcoat is a transparent paint that seals and protects any underlying material.  When I first tried both methods on my last model, I colored the panel lines first and then applied the topcoat.  The results were pretty messy to say the least.  Now I know I have to leave more drying time between both steps.  Here's what I mean.


First I sprayed Tamiya Clear Gloss on the parts with short, quick sprays to avoid ruining the paint job.


After giving the clear gloss the rest of the day to dry, I filled in the panel lines of the model using a specialty Gundam Paint Marker and a .005 ultra-fine paint Micron pen.  All I had to do was stick the tip in the grooves and follow along, and any mistakes were easily wiped off.


The next day, I applied the water-slide decals onto the model.  Almost all the Limited Model Gunpla give you one sheet of decals.  But if your follow the instructions to the letter, you never finish the whole sheet.  To put them on, you dip them in water for 10 seconds or so, let them stand on a dry surface for a few seconds more, slide them from their backing onto the parts with a toothpick and press them into place with a q-tip.  Since the clear gloss smooths out rough surfaces, having the decals conform to those surfaces was a piece of cake.


Once the decals were dry, I gave the parts another coat of clear gloss.  Several hours later, I finally put the parts together.

So how did the whole thing turn out?  You'll just have to wait for my next post to find out.  Until then, Goodbye Yellow Brick Road.

Tuesday, June 28, 2011

WIP: 1/144 LM Leo Custom--Part 3

If you looked up pics of this kit online, you'd find at least 3 of the Leo in some variant of its standard green color.  Since, of course, it's been done, I've decided on painting my Leo in its East Asian forces colors.


I wanted the paint to be as close to this as possible.


Going by what others have said online, I mixed Tamiya Royal Blue with White and rubbing alcohol (above).  After mixing different ratios of both colors, something was still missing (and my camera's flash makes everything brighter).  So I added some purple and once I was satisfied with the results . . .


I poured the new paint into an old, empty jar of thinner.


Once I colored most of the Leo with the new paint, I used Tamiya Purple, Chrome Silver, Clear Yellow, German Gray, Black and Testors Gray on the rest.

You're now officially up to speed.  The next few phases of completing the Leo will take a while.  In the meantime, let me know what you think so far.  My next entry will cover panel lining and adding a topcoat.  Until then, ride the big one.

Monday, June 27, 2011

WIP: 1/144 LM Leo Custom--Part 2

Welcome back.  For those who are just joining us, this WIP focuses on a limited edition model kit of a mass-production robot (which I'll refer to by the Gundam term mobile suit from now on), the 1/144 LM Leo Custom from Gundam Wing.  For this entry I'll talk about preparing the model for painting.

Though I've decided on a custom color scheme well ahead of time, the model's olive-green plastic was darker than the intended color and would've required at least several applications of paint to get the right tone.  To avoid that I would first add primer, an undercoat that helps paint to stick to a surface and keep its tone with fewer applications.  Primer is available in white for light colors and gray for dark colors, though you can paint a light surface in a dark color without it.


Pictured above is the only can of Testors brand primer (gray) available at my local arts-and-crafts shop.


At first, the primer worked well enough when I tried it on spare spare plastic.  But when I sprayed it on parts of the model itself (above), it took an eternity to dry.


Even when placed in front of a heater!

Fortunately, the primer is easily removed with a lacquer-based thinner.  So it's back to the drawing board.


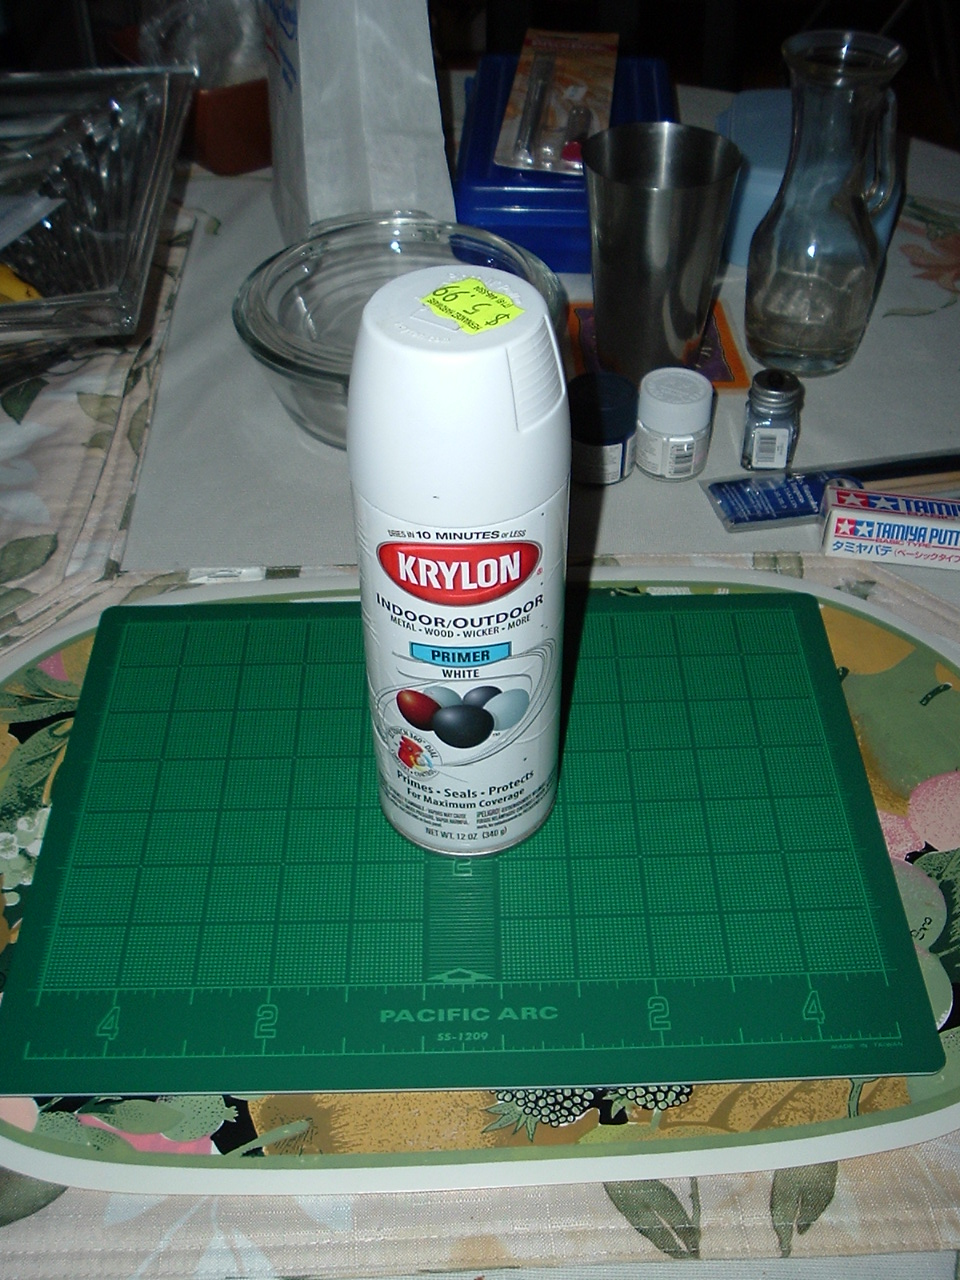
When the anime/hobby shop closest to my area stopped selling primer, I went and bought the cheap stuff from the nearest hardware store.  Though not intended for model kits, Krylon brand products have quite a reputation as substitute hobby supplies.  This can of primer costs half as much as modeling primer, carries twice as much liquid and works just as well.  The downside is that this primer leaves a rough finish that needs sanding; can cover up sculpted lines if sprayed too close; and leaves behind a lot of fine dust.  Of course, I've taken the necessary precautions when using this product.


Now I should point out that primer also exposes errors made in the removal of seam lines.  You fill in the seams with putty, sand the surface and add primer until the seams are gone (something I couldn't do with the Testors primer).  In the end, all things considered, I'd say the experiment was a success.


Look, it's a pic of the prototype 1/144 HG Leo, to be released in time for Gundam's 40th anniversary!

Rear View

Join me next time when I show off pics of the actual painting process.  Until then, say your prayers and take your vitamins.

Sunday, June 26, 2011

WIP: 1/144 LM Leo Custom--Part 1

I meant to do these work-in-progress entries (and finish my latest Gunpla project) much sooner.  But having only 2 days a week to myself--and me not always taking advantage of that precious time--my project's been dragging along for weeks.  But I've been taking photos of the Gunpla in almost every stage of the modeling process, and I pretty much recall each step.  So let's get crackin!'

I'm currently working on the 1/144th scale OZ-06MS Leo Custom (Gundam Wing) from the "Limited Model" (LM) series from Bandai, manufacturer of all things Gunpla.  Released in 1996, the LM line covered several anime shows and produced 6 Gundam kits, the Leo being the 4th kit on that list and the 15th in the whole series.    It originally sold for ¥ 800 ($10), but has now become more expensive and harder to come by.  I'm building one of 2 Leos I was lucky to snipe off eBay, the other being saved for my next project.

Front of Box

Back of Box

(From top left to bottom left) runner with arms and torso, runner with legs and weapon, instruction booklet, polycap joints, and water-slide decals.

As you can see, the kit is molded in one color, so painting's a must.  The polycap joints are the same ones used for 1/144 NG kits.  The difference is that the Leo's parts are thicker and heavier than of those other kits.


When you put 2 symmetrical parts together, you see a thin seam line from where both parts connect.  For your painted Gunpla to look its best, it's recommended that you remove that line.  You can fill it in with either plastic cement (Left), or with modeling putty (Right).  In this case, I used both to cover every inch before smoothing out the surface with sandpaper.  I also had to scrape off mold lines of excess plastic from several parts.


If you watched Gundam Wing, and you had a good eye, you'd notice that the Leo had 4 bolts on each kneecap.  Since this Leo has no bolts, I decided to improvise.  Cutting tiny bits from the polycap runner, I glued them on both kneecaps (Above).  And if you closely at the leg, you'll notice the areas where the seam lines used to be.

The next few pics show the complete, unpainted Leo:

Front View

Side View

Rear View

Action Pose

That's all for today.  Next time I'll show you how I prepared the Leo for painting.  Until then, good night and Godspeed.